
The 15 Best Lunge Variations to Level Up Your Leg Day
You’ve spent the week dreading it, but leg day is finally here. Your first go-to is likely the back squat — and with good reason. Barbell squats help you move a tremendous amount of weight. Along with deadlifts, they’re the most effective option for building max lower body strength. But as important as squats are, they’re not the be-all and end-all of lower body workouts. Supplementing your lower body routine with solid leg accessory exercises is a must in any well-rounded program. That’s where lunges and their variations come in.
The traditional forward lunge is a unilateral powerhouse of an exercise. It’s simple, relatively easy to master, and doesn’t require any equipment or significant space. By training unilaterally, you’ll iron out strength and muscle imbalances that you might develop under a barbell. Combating these asymmetries is crucial to keeping your squat and deadlift movement patterns robust, healthy, and efficient. And the more efficient your big lifts, the more weight you can move.
 Credit: MDV Edwards / Shutterstock
But forward lunges aren’t the only way to reap massive lower body unilateral training benefits. There are plenty of lunge variations that can help you make the most of your leg day accessories. When you need to inject a whole lot of balance and unexpected strength into your routine, you can turn to these lunge variations to give your leg day a much-needed boost.
Best Lunge Variations
- TRX Lunge
- Reverse Lunge
- Reverse Lunge With Rotation
- Pendulum Lunge
- Walking Lunge
- Lateral Lunge
- Skater Squat
- Split Squat
- Bulgarian Split Squat
- Front Foot-Elevated Reverse Lunge
- Jumping Lunge
- Tempo Lunge
- 1 ½ Lunge
- Overhead Split Squat
- Overhead Walking Lunge
TRX Lunge
There’s nothing "basic" about bodyweight exercises. Especially if you’re new to working out or are coming back from surgery or injury, it’s important to master the fundamentals. The TRX lunge can help you do just that when it comes to lunging.
By holding onto the TRX handles while you lunge, you’re giving your lower body and core the support they might need to complete a lunge. You can use this strategy to stabilize your balance and supplement your lower body strength while learning pretty much any new lunge variation.
Benefits of the TRX Lunge
- Using TRX handles to support your lunge supports you in learning the mechanics of the lift.
- The TRX lunge helps strengthen your lower body to prepare you for unsupported lunges.
- Athletes who are looking to try more advanced variations of lunges can use TRX lunges to support their balance and strength as they develop.
How to Do the TRX Lunge
Grab TRX handles in your hands at chest level. Step back to a point where there handles will support you if you lean back, but there’s enough slack for you to bring them to hip level. Hold the handles loosely and step back into a reverse lunge. Touch your back knee to the floor gently. Pull the handles toward your chest as you rise back to standing so that they help support your weight and balance. Reset and repeat.
Reverse Lunge
The reverse lunge is often the first kind of lunge that people learn, even if it’s paired with an assist from TRX handles. This lunge is a solid variation of the traditional forward lunge, which requires you to — you guessed it — take a step forward. The reverse lunge, fittingly, has the lifter take a step back instead.
Although lifters differ in their preferences based on their own sense of proprioception and biomechanics, many find the reverse lunge a bit easier to balance. If you want to load up on heavy weights, for example, you might use a reverse lunge to help you manage those big dumbbells. Or, if you’re just learning the move, reverse lunges can help you get a feel for it overall.
Benefits of the Reverse Lunge
- Many lifters see the reverse lunge as easier to balance than the traditional forward lunge, which makes it a great stepping stone to more advanced moves.
- Because you may find it easier to balance, you can potentially load this variation up fairly heavy.
- The reverse lunge can help your hips stay stable at the bottom of your squat.
How to Do the Reverse Lunge
Stand tall with your feet hip-width apart. Ground down into your left foot for balance. Step your right foot back behind you with enough distance for you to bring your back knee down to the floor at a 90 degree angle. Once the toes of your right foot are on the ground behind you, bend both of your knees. Sink down to touch your right knee gently to the ground at a 90 degree angle. Keep your front leg at a 90 degree angle, too. As you come back to standing, lift your back foot off the ground and bring it back to the starting position. Repeat on the opposite side.
Reverse Lunge With Rotation
This is a reverse lunge with a literal twist. The reverse lunge — especially loaded variations — requires some core strength to keep your torso upright. But adding in a rotation to the move will up the ante of the balance challenge. It’ll also bring your obliques more explicitly into the mix.
You’ll rotate toward the side of your front leg as your back leg steps back. So, if you’re stepping back with your left leg, you’ll rotate toward your right. Keep your chest tall and rotate through your rib cage rather than tugging your hips out of position.
Benefits of the Reverse Lunge With Rotation
- Adding a rotation to your reverse lunge increases your core engagement during this lower body move.
- You’ll involve your obliques in this one, which bodes well for developing more side-to-side stability.
- Since your upper body won’t be staying still, you’ll increase the balance and coordination challenge with this one.
How to Do the Reverse Lunge With Rotation
Set up to perform a reverse lunge. Maintain a tall torso. As you send your left leg back, lead with your right shoulder to twist your torso until you’re facing the right side of the room. Try to get your torso to face the right side of the room while your left knee touches the ground. Untwist as you come back to standing. Reset and repeat on the other side.
Pendulum Lunge
The pendulum lunge starts to add more dynamic movement to your regular forward and reverse lunge. Essentially, you’ll be combining the forward lunge and reverse lunge into one rep. You’ll start with a reverse lunge, then "pendulum" your way into a forward lunge. In doing so, you’ll transition immediately into a reverse lunge without your foot touching the floor in the middle.
If it’s not accessible to you to complete the transition without touching down on the ground, that’s okay. You can tap your toe down at the center standing position between lunge types if you need to. Over time, consider reducing and then eliminating the toe touch if you want to for a bigger balance challenge.
Benefits of the Pendulum Lunge
- By incorporating a forward lunge and a reverse lunge into each rep, you’ll be adding quality volume to your training.
- You dramatically increase the balance challenge with this variation, since one leg will stay grounded while the other acts as a pendulum.
- This move teaches a lot of movement discipline — moving too fast or too slow can both cause balance upsets.
How to Do the Pendulum Lunge
Stand with your feet hip-width apart. Ground your right foot into the floor for stability. Lift your left foot and step it back to perform a reverse lunge. When your back knee gently touches or approaches the ground, come back to standing. Without resting your left foot on the ground — or tapping it lightly — transition immediately into a forward lunge. Repeat for reps, then switch sides.
Walking Lunge
Walking lunges are a mainstay of many lifters who are serious about leg training — and have a lot of mental grit. They might look like walking with a bit of an exaggerated knee bend, but walking lunges are a brutal way to burn up your quads, glutes, and hamstrings.
You can load these puppies up in a variety of ways — with weights at your sides, goblet-style, or overhead. But if you’re not ready to add weight, the bodyweight version will do just fine. It’ll give you a major balance challenge, and your muscles will be taxed by the time you’ve gotten your reps in.
Benefits of the Walking Lunge
- Adding such a dynamic element to the traditional lunge adds an even bigger balance component to the lift.
- Your proprioception and overall body awareness can get a lot better the more you practice walking lunges.
- This move provides an excellent challenge to pretty much all your lower body muscles.
How to Do the Walking Lunge
Stand tall with your feet hip-width apart. Take a step forward with your right foot. Sink into a lunge until both of your legs are bent to 90 degrees at the knees. When your back knee gently touches or nearly touches the ground, press through your front foot and rise back to standing. Transition into lunging forward with your next foot. Repeat the process, alternating legs as you walk.
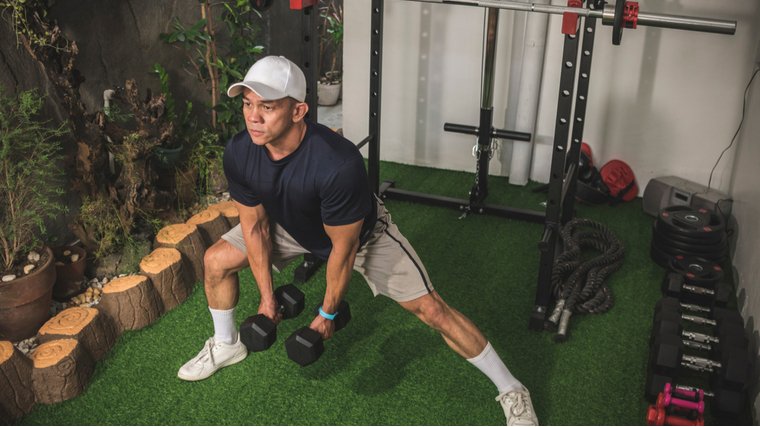
Lateral Lunge
Most lifters are very well-accustomed to moving in the sagittal plane. That is, movements that have you moving back and forth — walking lunges — or up and down — squats. When you move in the frontal plane, you’re going from side-to-side. Lateral exercises are in the frontal place, and they’re a tremendous boon to your overall lifting prowess.
Lateral moves like lateral lunges help combat any side dominance you might have in your everyday life. They also help iron out any movement imbalances you develop when you only work out in the sagittal plane. This variation also helps strengthen your adductors and abductors — think, your inner thighs. That helps you become a more resilient athlete, whether you’re squatting hundreds of pounds or dodging an errant bicycle on a sidewalk.
Benefits of the Lateral Lunge
- This variation targets your adductors and abductors, which help stabilize your hips, lower back, knees, and core.
- Many athletes don’t spend nearly enough time moving in the frontal plane — these lunges are an excellent way to practice that.
- Lateral lunges teach a unique kind of proprioception and balance that will help you with side-to-side imbalances.
How to Do the Lateral Lunge
Set up with your feet at hip-width apart with your toes facing forward. Step out to the right with your right leg. Sink back into a squat on your right leg, with your knee tracking over your toes. Keep your left leg straight with your foot in full contact with the ground. Press through your right foot to help you come back to standing. Reset and repeat.
Skater Squat
This one is basically a reverse lunge — except your back foot touches the ground at the same time as your back knee. Usually, you’ll step back and touch your foot down. Your knee will descend and follow more gradually. Your shin will remain parallel to the ground throughout the move.
Keeping your back leg in an isometric position really increases the pressure on your front leg to maintain balance. Your front leg will also need to develop a lot more strength to pull this one off, because you’ll be supporting the entire weight of your body throughout the entire rep. That’s different than other lunges, where your back toes will help you with weight support throughout most of the move. Hold onto TRX handles for balance and strength assistance if you need to.
Benefits of the Skater Squat
- This move helps you develop an even stronger sense of balance than your regular lunge because you won’t have your foot balancing your weight.
- Since your back foot and knee will both be off the ground for so long, you’ll essentially be performing part of a single-leg squat.
- You will develop a huge amount of strength in your front leg, preparing you to perform pistol squats.
How to Do the Skater Squat
Set up as though you’re going to perform a reverse lunge. Bend your back leg. Hold your shin parallel to the ground. Maintaining this parallel position, descend into a reverse lunge. Extend your arms out in front of you to counterbalance yourself. Your toes and knee should touch the ground at about the same moment. Come back to standing and repeat.
Split Squat
Think of split squats as static lunges. You’ll get into a reverse lunge position and — instead of bringing your feet back to center between reps — you’ll keep your feet in the same place throughout your reps. But that doesn’t mean they’re easy to pull off.
Because you’ll be in a static position, split squats lend themselves well to heavy loading, tempo reps, 1 ½ reps, and a wide variety of other intensity-boosting methods. No matter how you perform them, your quads, glutes, and hamstrings are in for a taxing time.
Benefits of the Split Squat
- Many lifters find this move easier to maintain balance-wise because your feet will be in the same position the whole time.
- If you tend to struggle with proprioception and knowing where your body is in space, you’ll only have to establish your proper position once (before your first rep).
- Since balance will be somewhat less of a factor, you can load this move up pretty heavily.
How to Do the Split Squat
Stand tall and step one foot back into a reverse lunge. Sink down into your lunge with your front foot planted and both knees reaching 90 degrees. Ground through your front foot to come back up to standing. Keep your feet where they are. Sink back down into another rep. Repeat for repetitions, then switch sides.
Bulgarian Split Squat
If you’re ever training with a buddy and want to be particularly evil, have them do Bulgarian split squats. Even lifters who love this move absolutely hate it. It’s a split squat, but with your back foot elevated on a plyo box or weight bench. Essentially, it’s the definition of all things evil.
The Bulgarian split squat isn’t "just" a bodyweight movement, either. It’s comparable to the back squat in terms of muscle activation, targeting the quads, hamstrings, glutes, and even your feet. (1) By elevating your back foot, you’re making an already excellent bodyweight move that much more effective.
Benefits of the Bulgarian Split Squat
- This unilateral leg exercise is comparable to the back squat — yes, the king of all lifts — in terms of muscle activation.
- It attacks your quads, hamstrings, glutes, and even the muscles in your feet.
- The Bulgarian split squat can be loaded fairly heavily (and will leave you sore for days, if you like that sort of thing).
How to Do the Bulgarian Split Squat
Stand in front of a weight bench or low plyo box. Place your back foot onto the bench, laces down. Find a position where you can lunge with your front leg reaching 90 degrees. Your back knee should approach the ground with your thigh relatively perpendicular to the floor (body shape- and size-depending). Ground through your front foot to return to standing. Sink back down into another rep. Repeat for reps and switch sides.
Front Foot-Elevated Reverse Lunge
This time, you’ll put your front foot on an elevated surface instead of your back foot. The elevation will provide a major extra stretch to your glutes, quads, and hamstrings. And the more of an active stretch you get, the bigger your activation and muscle-building potential.
Elevating your front foot gives your body a broader range of motion to travel through. That also translates into more capacity for hypertrophy. So you’ll be essentially taking the benefits of the split squat and deepening them — literally — with a loaded stretch.
Benefits of the Front Foot-Elevated Reverse Lunge
- Elevating your front foot will give you a bigger range of motion, which increases your muscle-building potential.
- You’ll also be providing a greater challenge to your hip mobility, which is beneficial to sinking into deeper squats with ease.
- Strengthening your body at your end ranges of motion makes you much stronger overall, which is what this exercise helps you approach.
How to Do the Front Foot-Elevated Reverse Lunge
Place your front foot on a low step or a bumper plate. Sink into a reverse lunge until your back knee grazes the floor or hovers just above it. Rise back into standing. Repeat for reps and switch sides. Keep your chest tall and hips squared throughout the movement.
Jumping Lunge
Adding plyometrics to your repertoire is a pretty sure-fire way to stoke your workout intensity. By getting explosive, you won’t only be helping your body get stronger. You’ll also be getting your cardiovascular work in because your heart rate won’t take long to shoot as high as you’re jumping.
You can jump in a static lunge, keeping your feet in the same positions while you do your reps. Or, if you’re really ready for an extra challenge, you can switch the positions of your legs while you’re in the air. You’ll sink into a lunge with your right foot forward and your left leg back. Then, explode up into a jump and switch your position. You’ll land with your right foot back and your left foot forward. Your coordination will jump through the roof along with the rest of you.
Benefits of the Jumping Lunge
- You’ll improve your coordination and body awareness at high speeds, especially when opting for a dynamic jumping lunge.
- This move is great for developing lower body power with nothing but your bodyweight.
- Jumping lunges are an excellent option for integrating cardio training into your routine with bodyweight exercise.
How to Do the Jumping Lunge
Set up ready to perform a regular lunge. Sink down into the lunge, loading your body like a spring. When you reach the bottom, push down hard with your feet. Swing your arms up as you explode up until both feet leave the floor. Land in the same position you started in. Alternatively, swing your foot position while in the air to land in the opposite lunge to what you started with. Either way, land softly by bending your knees. Move into the next rep as smoothly as you can. Repeat for reps.
Tempo Lunge
Jumping lunges are all about speed and power. Tempo lunges are all about slow control. Here, you’ll be emphasizing the eccentric — lowering — portion of the lunge. Move very slowly on the way down. Sometimes, tempo reps will also call for a brief hold at the bottom or a slow ascent, too.
You can perform tempo lunges with pretty much any lunge variation. If it’s your first time using this method, start with TRX lunges or reverse lunges. This way, your body can get an idea of what it’s like before applying it to more advanced variations like Bulgarian split squats.
Benefits of the Tempo Lunge
- This move emphasizes the eccentric component of lunges, which vastly increases your muscle-building potential.
- Tempo lunges increase your time under tension, which — in addition to its hypertrophy benefits — prepares your body for dealing with greater training volume.
- You’ll need a lot of mental discipline to get through these, which will help you practice the toughness you need under a barbell.
How to Do the Tempo Lunge
Read your tempo prescription. Say your tempo sequence is 3-1-1-0. That means you’ll spend three seconds lowering down into your lunge. Spend one second holding at the bottom. Push up to standing in one second. Spend no time (zero seconds) resting at the top before you descend into your next rep. Repeat for reps.
Deja una respuesta
►Te puede interesar...